Site Level Onboarding
Overview
Site level onboarding extends the in product onboarding journey so that a single business (legal entity) is onboarded once and then organised into locations — sites, branches, venues or clubs — each with its own stores (Ecommerce/MOTO and Point of Sale) and its own payouts.
The journey is driven entirely by PaySuite. Your product only needs to:
- Create the merchant with a single API call.
- Send the customer to the redirect link that call returns — either by redirecting the browser, or by embedding the PaySuite page in your product.
Everything after that is presented by PaySuite, and status changes are reported back to your product through the existing webhook events.

Concepts
| Concept | Description |
|---|---|
| Legal entity (merchant) | The business being onboarded and verified. |
| Location | A site belonging to the business — for example a hotel, a club or a branch. Every business starts with one location. |
| Store | A place where payments are taken within a location: an Ecommerce & MOTO store or a Point of Sale store. |
| Payout | The account funds settle into, along with the bank account those funds are paid out to. A location can have more than one payout. |
| Access Identity | The Access sign in used to identify the customer, so a returning customer is shown the businesses they already have. |
Site level onboarding is enabled per SoftCo. Whether a customer may reuse existing locations, or start onboarding for an additional business, is configured for you by the OnAccess team.
Step 1 — Create the merchant
Your product starts the journey with a single call:
POST /api/v2/merchants
The response returns a merchantId for the new business and a redirect link that starts the onboarding journey. The link can either be opened in a browser tab or embedded in your product, so the customer never has to leave it.
See the Create Merchant API documentation for the full request and response contract.
Every business is created with an initial location, so a customer with a single site never has to think about locations at all.
Step 2 — Sign in
The journey opens on a Welcome page, which sets out what the customer needs to hand before they start.
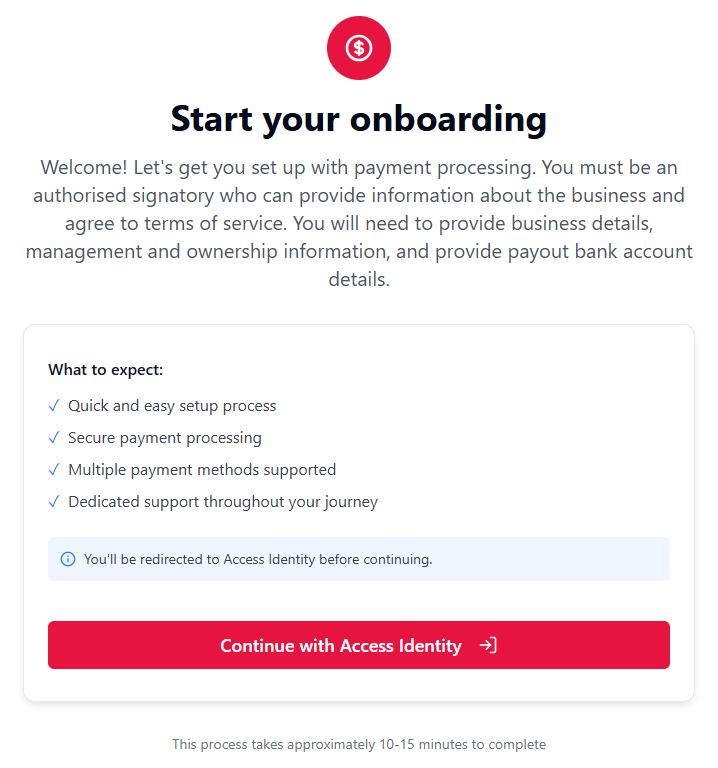
Continue with Access Identity opens the Access sign in.
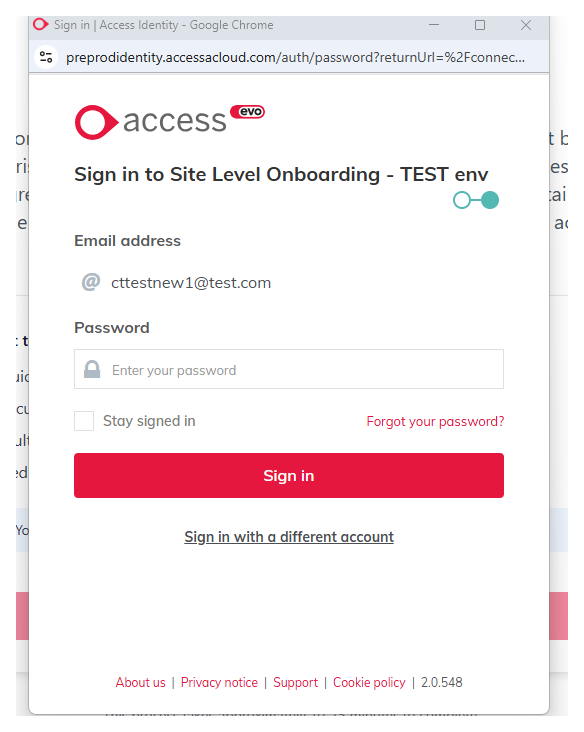
What happens after sign in depends on who the customer is:
| Situation | What happens next |
|---|---|
| First time customer | Onboarding continues straight away with the usual data capture, credit risk assessment and identity checks. |
| Returning customer | The customer is shown the businesses they already have, so they can continue with an existing one instead of creating a duplicate. |
Sign in opens in a popup window, so pop-ups must not be blocked on the page hosting the onboarding journey.
Step 3 — Select the business
A returning customer chooses which business to continue with. Businesses already onboarded are marked Completed; those still in progress are marked In progress.
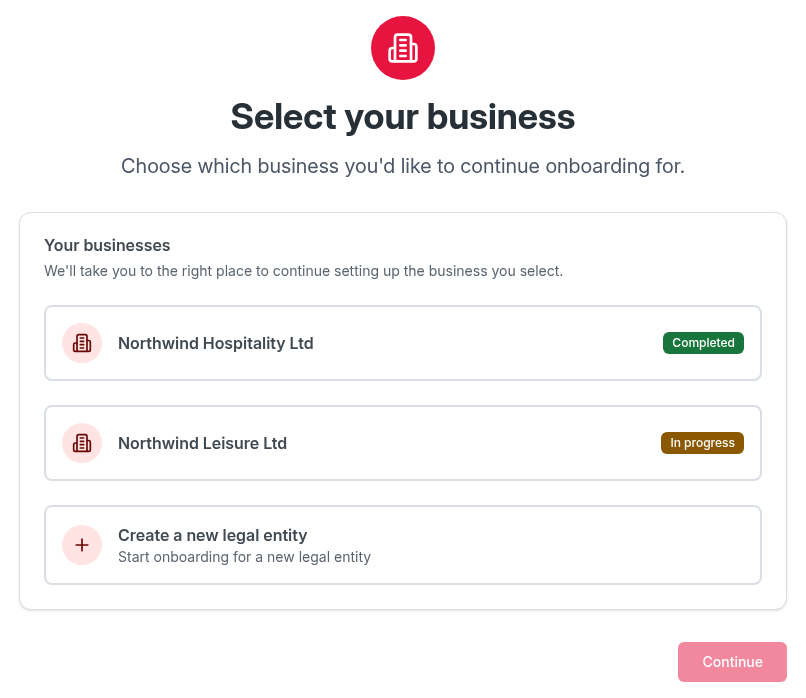
- An In progress business resumes its onboarding.
- A Completed business moves straight on to its locations.
- Create a new legal entity starts onboarding for an additional business, and is only shown when this is enabled for the SoftCo.
Creating a new business takes the customer down the standard onboarding path — data capture, credit risk assessment and identity checks — rather than to location selection. The location steps below apply once that business is onboarded.
Step 4 — Select or add a location
Once a business is onboarded, the customer manages the sites that belong to it.
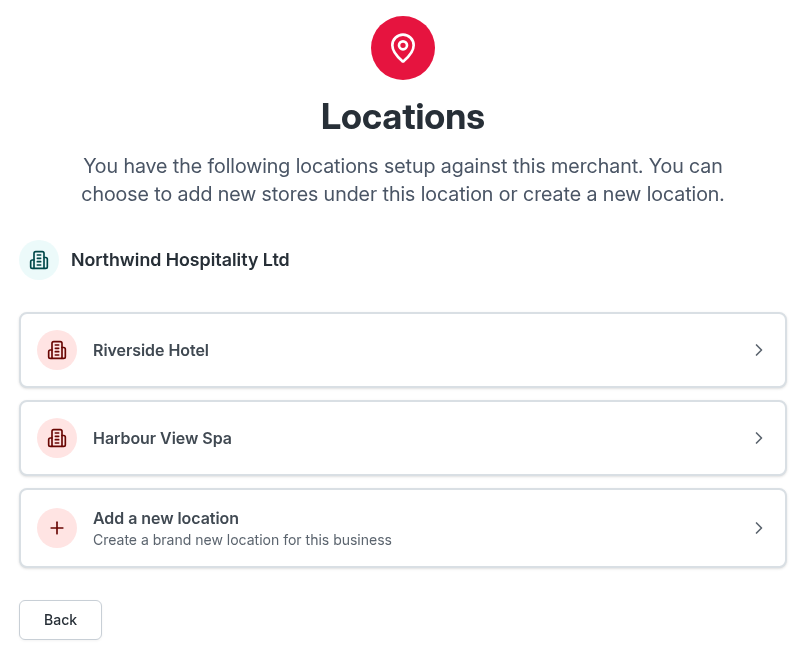
Add a new location captures a description for the new site and creates it against the business.
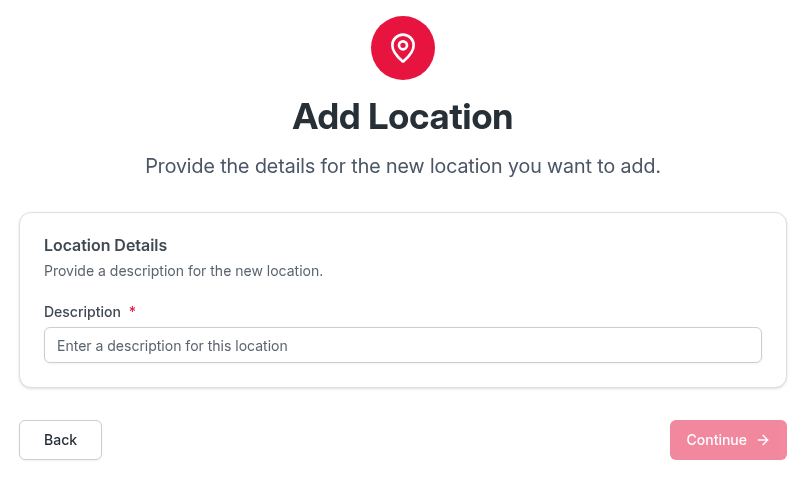
Where reusing locations is not enabled, the customer goes straight to this step and always creates a new location.
Step 5 — Manage the location
Each location has two areas: its payouts and its stores. The counts show what is already set up.
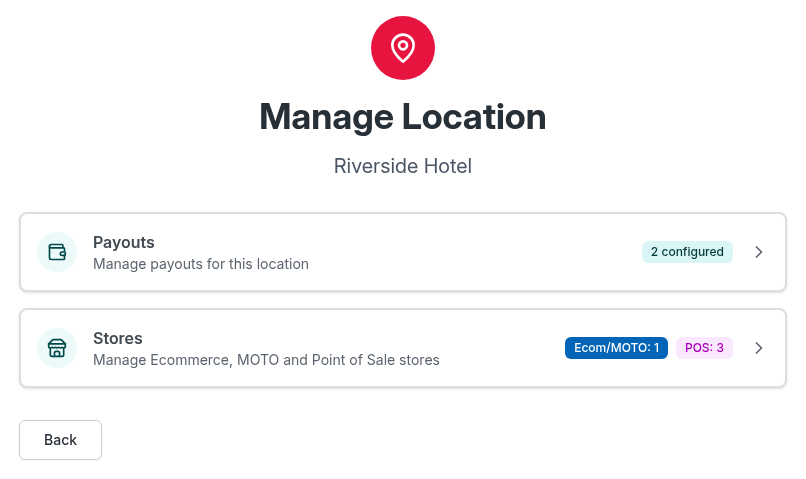
Payouts
Payouts show how long funds are held before payout, the payout schedule, any reserve held back, and the bank account funds are paid out to. From here the customer can add another payout, add a payout bank account, or change the bank account an existing payout pays out to.
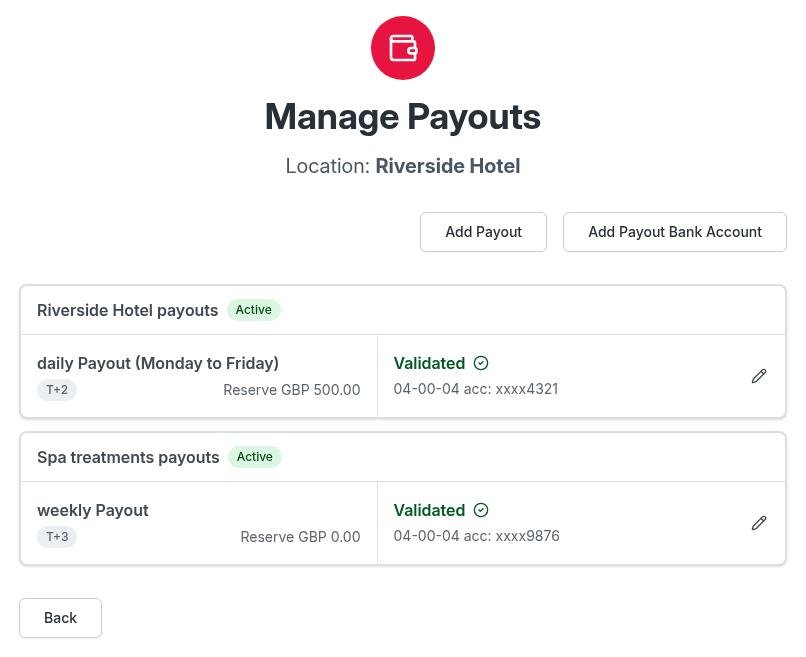
Bank details are validated and verified before they can be used.
Stores
Stores are listed per category — Ecommerce & MOTO and Point of Sale — with their status, address and the payout they settle to. Existing stores can be edited, and new stores added to either category.
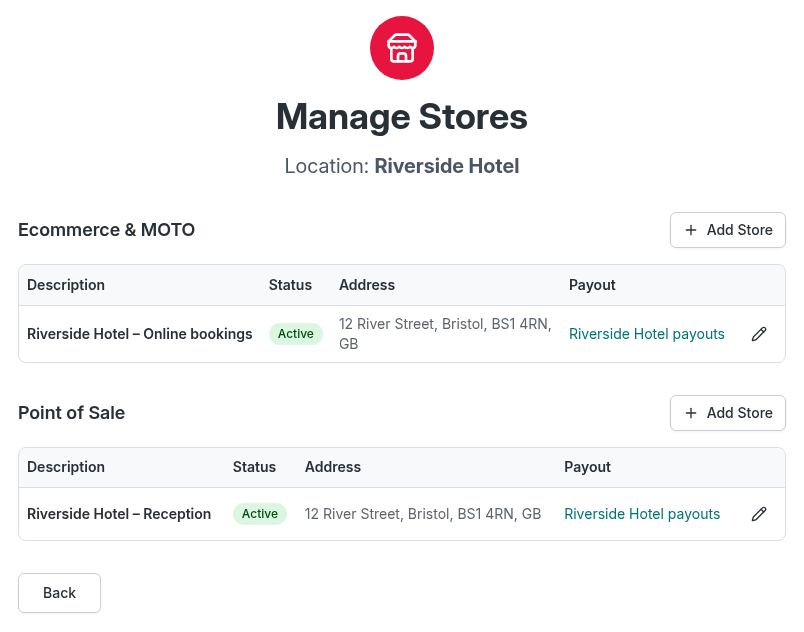
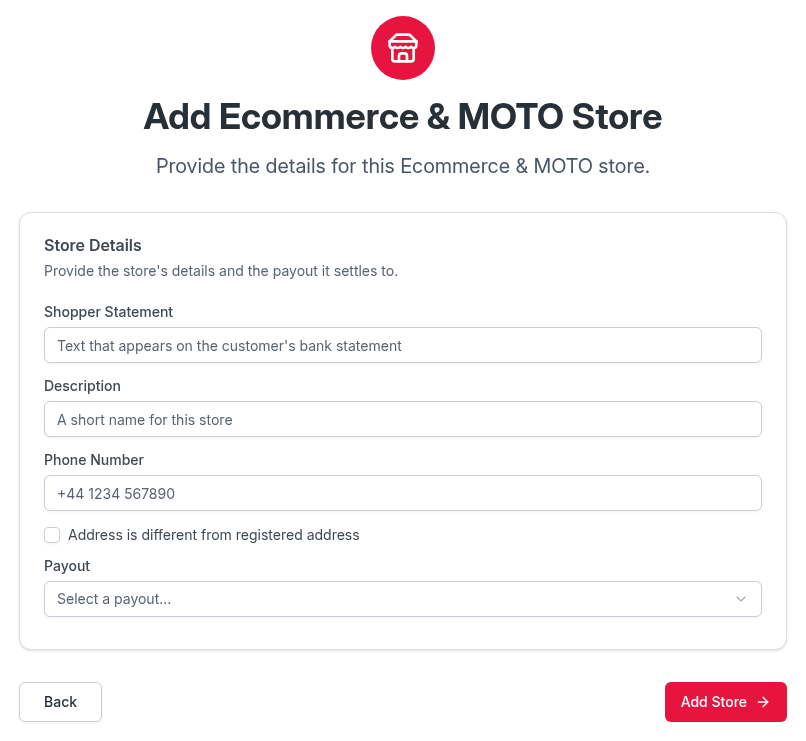
Adding a store captures the shopper statement (the text that appears on the customer's bank statement), a description, a phone number, an optional address that differs from the registered address, and the payout the store settles to.
Journey summary
| Step | Actor | Outcome |
|---|---|---|
| 1 | SoftCo product | Creates the merchant and receives the redirect link |
| 2 | Customer | Signs in with Access Identity |
| 3 | Customer | Continues the new business, or selects an existing one |
| 4 | Customer | Selects an existing location or adds a new one |
| 5 | Customer | Adds and manages payouts and stores for that location |
| 6 | PaySuite | Reports status changes back to the SoftCo product |
A business being onboarded for the first time completes data capture, credit risk assessment and identity checks before reaching the location steps.